
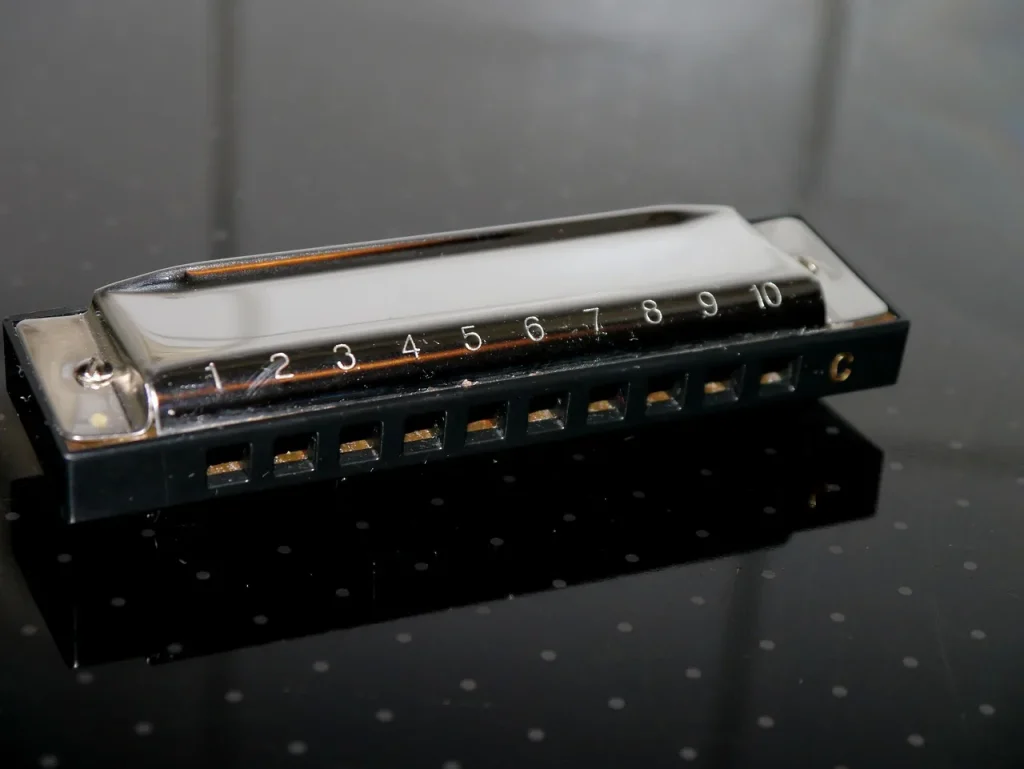
Guide objective: learn to locate the notes on a harmonica in C, play simple chords and memorize essential patterns to give your practice structure from the start.
Quick overview: the 10-hole diatonic model, popularized in the 19th century by Mathias Hohner, is compact, affordable and used in blues and folk. Richter tuning makes it an accessible introduction to music.
What you will learn: understand blow and draw notes, natural chords and blues rhythms, progressing step by step from the first hole to 12-bar sequences.
Key points: locate the holes, control your breathing, shape your embouchure and memorize the notes. This guide covers keys, models, techniques, styles, progressive patterns, modern tools and maintenance.
Expected result: a practical path from your first notes to shuffle rhythms that turns curiosity into musical skill.
A practical introduction to the diatonic harmonica in C for beginners
For beginners, the key of C offers a clear, practical starting point.
Why start with C: many teaching resources and backing tracks use this key. That makes learning easier and lets you play your first notes quickly.
Ten-hole models follow a simple principle: each hole produces one blow note and one draw note. Start with holes 4, 5 and 6, whose notes are steadier and easier to target.
You need very little equipment. This small instrument goes anywhere, and you can play melodies after just a few sessions. A reliable model such as the Hohner Special 20 reduces air leaks and helps you play in tune.
- Practice in short, regular sessions to improve quickly.
- Use diaphragmatic breathing and good posture for a steady sound.
- Use apps (Jamzone, HarpNinja, Harp Trainer) to spot mistakes and slow down songs.
| Feature | Benefit | Tip |
|---|---|---|
| 10 holes | Clear layout | Start with holes 4, 5 and 6 |
| Hohner Special 20 | Air resistance and ease of playing | A good choice for beginners |
| Apps | Immediate feedback | Use them for 10 to 15 minutes a day |
Why choose a harmonica in C to begin
A standard key gives you access to useful learning resources.
Ideal for beginners: this key makes it easier to find widely used sheet music, videos and backing tracks. Its scales are simple to memorize, bringing quick, motivating results.

Getting started, cost and results
This popular beginner’s choice combines simplicity with a reasonable cost. You can find a reliable entry-level instrument without spending a fortune.
Prioritize an airtight fit, stable reeds and accurate tuning to build confidence from your first sessions.
Key, styles and versatility
The diatonic harmonica excels in blues and rock, but also suits folk, accompaniment and improvisation through patterns that are easy to transpose.
Can you begin in another key? Yes, but C remains the simplest key for understanding how notes work and playing along with common accompaniments.
To learn more, consult this guide to get started with a recommended model and refine your choice of first instrument.
Harmonica in C: notes, chords and basic patterns
To get started, quickly identify the hole that will serve as your tonal reference. This reference helps you direct your breath and memorize pitches.
Locating holes and blow and draw notes
Each hole produces one blow note and one draw note. Blowing into hole 4 produces the tonic, a useful reference point.
How major chords work
Blow notes form the natural chord positions on the instrument. Draw notes in the low register provide a strong harmonic foundation.
With Richter tuning, some scale degrees are missing from the low octave and require bends.
Essential patterns and exercises
The 12-bar blues (I-IV-V) and shuffle are ideal for working on your pulse. Start slowly, then increase the tempo with backing tracks.
- Play C-E-G patterns back and forth to connect what you hear with the harmony.
- Hold long notes with a metronome.
- Alternate blow and draw notes on holes 4, 5 and 6.
Tip: record your sessions and use apps to check your blow-note pitch in real time. To explore playing positions further, consult these chord positions.
Understanding tunings: Richter, Solo Tuning and Paddy Richter
Understanding the main tunings changes what you can play and how you play it.

Richter tuning: standard on 10-hole models, it favors rhythm playing and accompaniment. Blow notes often form the major chord, while some notes are missing from the low octave. Bends, overblows and overdraws fill the gaps and open up sounds associated with jazz.
Solo Tuning
Solo Tuning includes F and A from the first octave. It makes continuous melodic playing easier without bending. In return, some draw chords become less accessible, and the high register may be more limited.
Paddy Richter
This variant raises the blow note on hole 3 by a whole step, giving you an immediate A in the low register. That helps with Celtic tunes and other musical styles that call for this sound.
- Practical tip: choose according to your needs: Richter for blues and accompaniment, Solo for melodic lines, and Paddy for traditional repertoire.
- Practice overnotes carefully to protect the reeds as you develop your technique.
Choosing a diatonic harmonica: criteria, brands and models
A good instrument makes learning easier from your first sessions. Before buying, check three things: airtightness, reed quality and comb material. They directly affect sound quality and breath response.

Quality, airtightness and comb
Airtightness: the top priority for preventing air leaks and getting a clean attack.
Comb: plastic is easy to maintain, wood gives a warmer sound, and metal adds durability.
Leading brands and heritage
Lee Oskar stands out for its modular reed plates. Like Hohner, the brand has played a part in the instrument’s industrial development; Mathias Hohner helped make it widely accessible. Suzuki is known for precision manufacturing.
A good beginner model
To start, choose a dependable model: the Special 20 (ease of playing), Lee Oskar Major Diatonic (durability) or Suzuki Bluesmaster (clarity). Choosing the standard key gives you access to popular lessons and backing tracks.
| Criterion | Effect | Recommendation |
|---|---|---|
| Airtightness | Immediate breath response | Check for air leaks |
| Comb | Tone and comfort | Wood for a warm sound, plastic for easy maintenance |
| Brand | Reliability and service | Lee Oskar, Hohner or Suzuki |
Basic techniques: posture, embouchure and breathing
How you hold the instrument and breathe affects your progress from the first session.
Posture: hold the instrument at 45° with your back straight and shoulders relaxed. This angle improves airflow and reduces leaks.
Diaphragmatic breathing: inhale deeply, then control your exhalation. Practice long notes with a metronome to steady your playing and improve your sound.
Embouchures and their musical uses
Lip pursing isolates one hole for greater accuracy. Tongue-blocking lets you produce chords and rhythmic textures.
Practice in front of a mirror to check your embouchure and reduce facial tension.
Bending and overnotes: progression and precautions
Begin bends with small adjustments to your tongue and jaw to lower a note by a semitone. Progress slowly and listen to each change.
Take care: avoid overusing overnotes. Work on air pressure and relaxation to protect the reeds and extend the instrument’s life.
- Suggested routine: 5 minutes of long notes, followed by 5 minutes alternating blow and draw notes on the middle holes.
- Listen to established players to improve your attack and intonation.
- Alternate technique sessions with playing along to backing tracks so you improve while enjoying yourself.

| Aspect | Action | Expected result |
|---|---|---|
| Posture | Hold at 45°, shoulders relaxed | Fewer leaks, better airflow |
| Breathing | Diaphragmatic breathing, long notes with a metronome | Steadier playing, better sound quality |
| Embouchure technique | Lip pursing and tongue-blocking | Accuracy for solos, richer chords |
Musical styles: from blues and folk to jazz
Exploring several styles helps you find your own voice on the instrument.
Ideal for blues: blues playing favors Richter tuning because the blow notes often form the major chord. This layout supports riffs, chordal accompaniment and expressive bends.
Core blues techniques include bending for blue notes, vibrato for warmth and shuffle for a strong groove.
Folk blues: simplicity and dialogue
Folk blues uses simple patterns built around the I-IV-V chords. Call & response phrases create a dialogue with the accompaniment.
Start with short riffs, hold a few expressive notes, then make your lines more complex.
Jazz and other styles
When the music calls for a full chromatic range, consider a chromatic harmonica with a side button. It gives you the melodic freedom needed for jazz.
- Adapt your grooves: eighth notes for rock, triplets for shuffle and controlled syncopation for jazz.
- Listen to traditional blues and then modern folk to understand timing and articulation.
Practical tip: the diatonic harmonica has a distinctive character beyond blues. Adapt your playing to your chosen style and listen closely.
For structured exercises, consult this learning resource: recommended lessons.
Progressive patterns for faster improvement
The most effective method combines focused scales, steady arpeggios and controlled rhythm practice.
Scales and arpeggios: pitch and fluency
Start with the major scale around holes 4 to 7 to work on pitch and breathing. Practice slowly with a metronome at 60 BPM, playing four bars per phrase.
Add C-E-G arpeggios and their inversions. These exercises establish harmonic reference points for accompaniment on this instrument.
Typical rhythms: shuffle, eighth notes and call & response
Practice 12-bar blues with a shuffle rhythm to develop a steady pulse. Alternate it with straight eighth notes for rock and pop.
Call & response structures an exchange: play a short phrase, let the accompaniment answer, then repeat with a different attack.
- Metronome progression: play cleanly at 60 BPM, then gradually increase the tempo.
- Weekly cycle: scales, arpeggios, rhythms and guided improvisation.
- Recording: assess your rhythmic steadiness and intonation.
Technique tip: add small variations (shifted accents, syncopation, note order) and a short jazz-style chromatic phrase to develop your ear while staying grounded in the key.
| Goal | Exercise | Expected result |
|---|---|---|
| Pitch and accuracy | Scales on holes 4 to 7 with a metronome | Better note intonation |
| Harmonic confidence | C-E-G arpeggios and inversions | Reliable reference points for accompaniment |
| Rhythm | Shuffle, eighth notes, call & response | A steady groove and clear phrases |
Modern tools and practice resources
Today’s technology lets you isolate, slow down and analyze musical phrases in a few clicks.
Jamzone lets you slow a song to 50% speed, loop a section and record your takes. It is useful for checking intonation and making progress in short sessions.
HarpNinja displays pitch errors in real time. It highlights differences so you can correct your technique quickly.
Harp Trainer checks your tonal center and how steadily you hold long notes. Use it to stabilize your intonation.
- Suggested routine: warm up, use a metronome, practice with backing tracks, record yourself and listen critically.
- Practice with 12-bar blues backing tracks in E to strengthen your rhythmic confidence on a diatonic harmonica.
- Vary the musical styles of your backing tracks to broaden your rhythmic vocabulary.
Key points: break practice into manageable sessions, use headphones or monitors to hear fine details, and keep a digital practice journal with screenshots and audio exports. Set small daily goals: a clean scale, a steady pattern and a smooth 12-bar sequence.
Instrument care, accessories and maintenance
A few regular steps help preserve good sound quality. Start by gently shaking the instrument to remove particles, then brush between the holes with a fine brush. Wipe the comb with a microfiber cloth and let it air-dry.
Disinfection: lightly spray isopropyl alcohol on the reeds without soaking them, then let the instrument dry completely before putting it away. Avoid running water on wooden models so the comb does not warp.
Plan a careful disassembly every six months to remove dust and check that the plates are flat. Handle the screws gently to avoid damaging the assembly.
Recommended cases and kits
To protect the instrument, choose a hard case for travel (€25–40), a soft case for everyday use (€15–20), or a molded case (around €19) for a snug fit. A dedicated cleaning kit and a small brush for narrow spaces are useful purchases.
After-session checklist: wipe the instrument, let it air briefly and check for residue. Regular care makes it more dependable on stage and in rehearsal.
| Action | Frequency | Goal |
|---|---|---|
| Wiping | After every session | Preserve sound quality |
| Disinfecting the reeds | After heavy use | Hygiene and longevity |
| Complete disassembly | Every six months | Check the reeds and plates |
Conclusion
Focused repetition turns technique into music.
Key points: locate the holes, memorize the natural blow-note positions, and practice 12-bar blues and shuffle to develop strong habits.
Choose a reliable model (Hohner Special 20, Lee Oskar Major Diatonic or Suzuki Bluesmaster) for a rewarding musical experience. Make use of Richter tuning for blues and folk blues. Use Jamzone, HarpNinja or Harp Trainer to structure your sessions.
Maintain the instrument regularly to preserve its sound quality. Reinforce the basics: holding a blow note, keeping a steady rhythm, breathing and posture. Take small steps every day and enjoy creating your own melodies.