
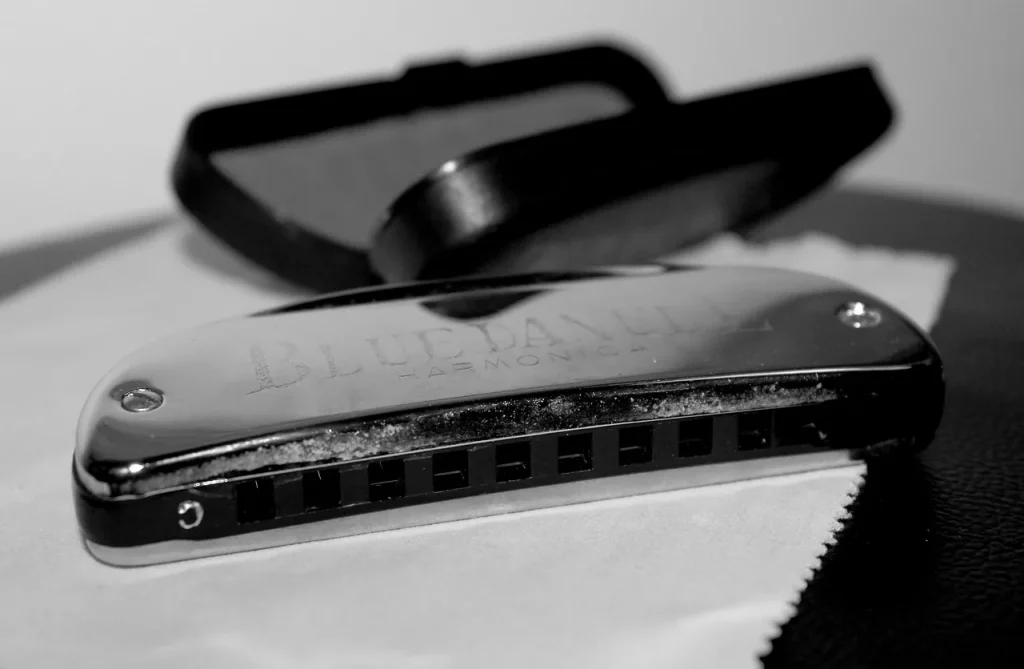
Goal: learn to add notes to your harmonica, enrich your playing, and fill gaps in its range.
Quick overview: the method relies on precise tongue placement and controlled airflow. Sébastien Charlier and other players (JersiMuse, Manip, Christelle Berthon) confirm that sound technique can produce these notes even without extensive instrument adjustment.
This guide offers a clear method and progressive exercises. It covers how to produce the notes, recognize physical cues, make useful adjustments, and incorporate them into music.
Practice regularly, even if you have little time. Give each session a specific goal to improve your tone, intonation, and phrasing.
Why practice overnotes to play every note on a diatonic harmonica?
Reaching every pitch on a diatonic harmonica opens up new expressive possibilities. The main reason is simple: access to every note without changing instruments lets you play more styles and enrich your music.
These notes complement existing bends. They fill gaps in the scale and reduce the need for multiple instruments. Many players on forums confirm that these sounds soon become part of their musical phrasing.
The difficulty is often overstated. With a well-structured course, you can learn these notes as a natural extension of bending. Devoting a little time each day for a few months can noticeably improve your intonation and tone.
“Adding these notes is more than an isolated feat: it is a way to enrich your phrases.”
To progress faster, follow a progressive course. Keep the musical goal in mind: coherent phrases, stylistic fit, and freedom of expression.
Understanding the basics: bends, overnotes, and how reeds work
Understanding reed mechanics makes overnotes less mysterious. During a correctly played bend, the opposing reed often takes over. This change is the physical principle behind most additional notes.
There are exceptions: the single bend on draw 3 and the single bend on blow 10 can produce the note without activating the opposing reed. That is why their tone sounds different.
A simple example: a bend on hole 4 is produced by choking the draw reed. This shows that the sound source can change with the situation.
The tongue’s position, not just its movement, determines pitch and tone. The same placement can produce a bend or an overblow on hole 6, depending on the direction of airflow.
Control the flow of air: too much disturbs the balance between the reeds. A minimal adjustment also helps: the reed’s angle and its gap from the reed plate must allow steady vibration so that the note speaks reliably.
- Key point: a bend engages the opposing reed.
- Implication: good placement promotes consistent tone.
- Adjustment: a controlled angle and gap improve stability.
Overblows and overdraws: when and how to practice them
When to move on to overnotes depends on your current skills. First, strengthen your conventional bends.
Learning order: master blow and draw bends first. Then try overnotes without changing your tongue position. This approach helps prevent bad habits.
Checkpoint: if you can move from a bend on hole 6 to a hole 6 overblow without moving your tongue, you have acquired the technique. Otherwise, continue with focused practice.
- Goals: prioritize accurate pitch and a rounded tone; a shrill note is not a success.
- Adapt to your level: start in the middle octave (holes 4, 5, and 6), then tackle harder cases.
- Manage your time: practice in short, regular sessions. A few minutes a day supports progress over several months.
- Adjustment: adjust the instrument only once your technique is sound; otherwise, the adjustment may hide the problem.
- Check the reeds: excessive gaps make a clean note harder to produce. Precise realignment and consistent gaps improve stability.
“Avoid unnecessary force; aim for precision from the start.”
A technique that works: tongue placement and airflow control
Precise tongue placement, combined with steady airflow, is the key to success. Use rib and abdominal breathing to keep airflow even and pressure low. This stabilizes the tone at the end of the note’s attack.

Four tongue positions for the full chromatic scale
From front to back: position 1 (front), 2 (middle), 3 (back-middle), and 4 (back). Each position is a mental reference for finding a specific note again.
Think of an overblow as a draw bend and an overdraw as a blow bend
Think of an overblow as a reversed draw bend and an overdraw as a blow bend. This comparison makes the notes easier to remember and reproduce.
Minimal pressure, constant airflow, rib and abdominal breathing
Aim for low pressure and an even flow of air. Excessive force causes squeaks and harms intonation.
Physical cues by octave: low, middle, and high
Low: a throaty sensation and firm points of contact. Middle: a centered, rounded sound. High: subtle, precise placement. Remember these sensations so you can quickly find the right position.
| Tongue position | Area | Use | Sound cue |
|---|---|---|---|
| 1 | Front | High notes | Clear attack, subtle placement |
| 2 | Middle | Middle octave | Round, centered sound |
| 3 | Back-middle | Transitions in the low range | Dark tone |
| 4 | Back | Low octave | Throaty, “Darth Vader” sound |
“Practice slowly: sustain the note, check it with a tuner, and increase the speed only when it is stable.”
For practical examples and technical discussion, see this forum thread: advanced harmonica technique.
Progressive exercises for your first overnotes
Short, regular exercises provide a reliable way to produce your first overnotes. Follow a simple method: steady position, controlled breath, attentive listening.
Guided steps: from a bend on hole 6 to a hole 6 overblow without moving your tongue
Hold an in-tune bend on hole 6 and keep your tongue in place. Reverse the airflow without moving, try to trigger the overblow, then release slowly.
Useful note sequences and integration
Practice the sequence -1 → -1° → +2 as an example of musical integration. Play it slowly so the transition sounds musical.
Start pianissimo, then increase the volume with control
Start pianissimo to refine the tone. Then increase the volume without losing accurate pitch. Check it with a tuner and adjust your tongue slightly if needed.
- Sets: play three times in each direction, using short repetitions.
- Take a brief break between sets to maintain accuracy.
- Practice: 5 to 10 minutes a day for a few months.
- Focus on placement rather than tape or varnish to produce the note.
| Step | Duration | Goal |
|---|---|---|
| 10 repetitions of the bend on hole 6 | 2 min | Stable placement |
| Reverse the airflow without moving | 3 sets | Trigger the overnote |
| Sequence -1 → -1° → +2 | 5 min | Use it in a phrase |
“A little progress each day produces lasting results.”
Harmonica adjustments: when to make them and how to avoid pitfalls
Adjusting a harmonica should be a considered choice. Check your technique first: if the note sounds consistently without artificially changing your tongue position, adjustment may make playing more comfortable, but it is no magic solution.
Reed gap, realignment, and arcing
Start by realigning the reeds. Set the gap between reed and plate as narrowly as your playing allows.
Arcing should be slight and symmetrical. Too much curvature creates instability. Aim for good response without making the note difficult to sustain.
Varnish, wax, or tape: stabilize without adding weight
Apply a little varnish or beeswax at the rivet points without coating the reed tongue. This reduces squealing without weighing down the reed.
Tape is a simple way to stabilize some overnotes. Start with a small trial before using more.
Retuning and airtightness
Always retune the instrument after an adjustment: even a spot of varnish can change a note’s pitch. Check its tuning and clarity.
Finally, make sure the comb is airtight. A well-sealed instrument lets you play loudly without forcing the air.
“The best adjustment lets your breath speak.”
- Final test: slowly play a chromatic scale to check response and tuning.
- Practice: repeat these checks every few months.
Quick diagnosis and fixes for common problems
An unstable note often has a simple cause. Before changing the instrument, check your tongue position and air pressure.
Overblows that are too low
Symptom: the overnote sounds lower than expected.
Fix: move the tip of your tongue slightly forward. Test by briefly sustaining the note. If the middle-range draw bend is too low, the overnote will have the same problem.
Overdraws that are too high
Symptom: the note will not come down in pitch and sounds shrill.
Fix: move your tongue back and reduce pressure. Address the cause without blowing harder. Approach the note like a high blow bend and adjust your placement accordingly.
Squeaking or squealing
Symptom: an unwanted noise appears while you sustain the note.
Realign the reeds first. Make small adjustments, then test. If necessary, apply a little varnish or wax at the contact points to improve the seal slightly.
- Check related bends: a poorly executed opposing bend affects the overnote.
- Favor targeted, minimally invasive adjustments; test after each step.
- Check whether the note holds: if you can sustain it for a few seconds, it is stable.
| Problem | Common cause | Quick fix |
|---|---|---|
| Note too low | Tongue too far back | Move the tongue forward and briefly sustain the note |
| Note too high | Tongue too far forward or excessive pressure | Move the tongue back and reduce airflow |
| Squealing | Misaligned reed or air leaks | Realign, apply a little varnish, and retest |
“In most cases, only one reed should vibrate: if both sound, revisit your technique or the adjustment.”
Using overnotes in music: scales, octaves, and musical examples
Putting overnotes into musical phrases turns a technique into a real vocabulary. Begin by connecting each overnote to its counterpart in another octave: 6 OB sounds like a bent 3 an octave higher, 7 OD corresponds to a bent 4, and 9 OD to a bent 6. These references help you choose target notes when improvising a solo.

Practical scales: work in the high register to use these notes in context. Useful examples on a C harmonica:
- Blues in G: holes 6 to 10 (ideal for linking overnotes and bends).
- Blues in C: holes 7 to 10 (emphasizes blow bends).
- Blues in A on a C harmonica: excellent for varying tone colors and phrasing.
Alternate passing notes and target notes. A passing note colors a phrase; a target note resolves its tension. Play the chromatic scale slowly at first to stabilize your intonation, then raise the tempo.
Add short patterns combining bends and overnotes. Return to the physical cues: keep the same tongue position and simply reverse the airflow to move from a bend to an overblow. Review your neighboring octaves each month.
To exchange ideas with other players and explore adjustments in more depth, see this technical forum thread: overnote technique and adjustments.
A plan for several months of practice to play every note
Planning your practice over several months gives you a clear route to every note. This schedule combines technique lessons, breath exercises, and targeted adjustments.
Sample monthly program:
- Month 6: a one-octave chromatic scale and consolidation of the bend on hole 6.
- Month 7: bends on holes 5 and then 4, focusing on sustain and intonation.
- Month 8: bends on holes 1 and 3, incorporated into phrases.
Continuing the program with overnotes
In month 9, work on the bend on hole 2 and the blow bends on holes 8 to 10. In month 10, make fine adjustments, then introduce the hole 6 overblow.
Next, expand your practice to 5 OB, 4 OB, and then 1 OB. Add a two-octave chromatic scale and check transitions between positions.
Time: short daily sessions, weekly reviews, and one musical example each month to confirm your progress.
“The method builds skills cumulatively: little by little, every note becomes accessible.”
| Period | Goal | Weekly practice time |
|---|---|---|
| Months 6 to 7 | Bends on 6, 5, and 4, then a scale | 3 × 10 min |
| Months 8 to 9 | Bends on 1, 3, and 2, then blow bends | 3 × 12 min |
| Month 10 onward | Adjustments, overnotes 6 → 5 → 4 → 1, and a two-octave chromatic scale | 4 × 15 min |
Practical cases by hole and octave: 1 to 10
Let’s move to practical applications: here are concrete cues for each octave, suited to your level.
Low octave
For OB1, the sensation is pronounced: a throaty anchor, like a dark, “Darth Vader” breath.
Choke the reed with the rear-middle part of your tongue and channel the air without excess. This position helps activate the opposing reed.
Middle octave
Holes 4, 5, and 6 are your starting point. Play this simple example in sequence: 4 overblow → opposing bend → 5 overblow → bend → 6 overblow.
Repeat slowly, control the airflow, and aim for consistent tone between each bend and overnote.
High octave
Holes 7 to 10 require subtle placement and measured pressure. Accurate pitch matters more than volume.
Christelle Berthon shows that stable playing relies on a constant flow of air and very precise tongue placement.
“Start in the middle octave, then tackle the low and high ranges once you have gained stability.”
- Watch the reeds: realigning them and reducing the gap may help.
- Make slight adjustments: narrow the gap, realign the reeds, and apply a little varnish if they squeal.
- Write down short patterns for each hole to check that the notes sound consistent.

| Octave | Focus | Advice |
|---|---|---|
| Low (1) | Throaty anchor | Tongue toward the back, channeled air |
| Middle (4 to 6) | Starting point | Exercises 4 → 5 → 6, opposing bends |
| High (7 to 10) | Subtle placement | Measured pressure, with pitch accuracy first |
Bring tone and intonation together: a rounded sound and consistency between bends and overnotes
The goal is to produce a note that blends with a standard bend. A well-played overnote should not sound different simply because it requires a special technique.
Hear it before playing. Imagine the note’s tone color and pitch before you play it. This anticipation guides your tongue and breath. A gentle attack immediately stabilizes the pitch.
Remembered placement
Identify each tongue position. Finding it without hesitation helps maintain the same tone across bends and overnotes.
Breath control
Less air, better results: too much pressure harms tone and intonation. Make small tongue movements instead of forcing the note.
- Aim for consistency: use the same placement to make an overnote sound like its corresponding bend.
- Prepare your ear: hearing the note in your mind before playing helps accuracy.
- Test sustained notes: hold a note and observe its stability; if it becomes shrill, release it and correct your tongue position.
Routine: gradually add these checks to your sessions. Focused repetition and a gradual increase in volume, from pianissimo to controlled intensity, strengthen the technique.
“A clean overnote should blend with the bend: the same tone and the same intention.”
Methods and resources: lessons, forums, and practical guides
To progress without skipping steps, choose a guided method and practice regularly.
HarmoChopin and other programs offer methods spread over several months. They introduce bends first, followed by overnotes, breathing, and instrument adjustment.
Lessons provide targeted advice and help correct bad habits quickly. Teachers check tongue position, airflow, and essential adjustments.

Progressive teaching approaches
Choose short monthly sequences. Increase the difficulty to suit your level. Turn each exercise into a short musical study to stay motivated.
Forums and player experiences
Visit a French-language forum for step-by-step adjustment advice, examples, and feedback from Sébastien Charlier, Christelle Berthon, or JersiMuse. Overblow.com and Turboharp remain useful technical resources.
| Resource | Use | When to use it |
|---|---|---|
| HarmoChopin | Structured program | From beginner to intermediate level |
| French-language forum | Feedback and recordings | When in doubt |
| Overblow.com and Turboharp | Diagrams and stabilization | Advanced adjustment |
“Talking with other players helps you correct mistakes faster and builds confidence.”
Myths and realities: “blow harder” and “adjustment is all that matters”
You often hear simplistic advice that does not hold up in practice. Myth: more force gives you more control. Reality: excessive airflow upsets the reed and worsens the tone.
Another myth is that extensive adjustment alone guarantees these notes. Adjustment helps stabilize them, but the main reason you can produce them is technique: tongue position and airflow control.
Players confirm a few practical facts: even standard harmonicas can produce overblows after work on placement. If a note becomes shrill, reduce the pressure. If it is out of tune, adjust your tongue.
“Technique often comes before adjustment: correct your breath and position first.”
| Myth | Fact | Simple action |
|---|---|---|
| Blowing harder helps | Force destabilizes the reed | Reduce airflow and adjust the tongue slightly |
| Only adjustment matters | Adjustment adds comfort but works no miracles | Work on placement, then refine the instrument’s adjustment |
| A new mechanism is needed | The overnote follows the opposing bend | Find the same tongue position |
A quick checklist before each practice session
A quick check before you start prevents long, unproductive sessions. This short routine sets you up well and helps you define a specific goal.
Placement and breathing
Set today’s goal: choose one or two notes to stabilize and record the target pitch on your tuner.
Check your tongue position: find your reference point without searching for it. Good placement makes learning easier.
Airflow and reeds
Set the airflow: use rib and abdominal breathing, a steady flow, and moderate pressure.
Check the reeds: quickly inspect their alignment and gaps; adjust only if you find an obvious problem.
Starting and checking
Begin with a gentle attack: establish the note, then slowly increase the intensity if you can sustain it cleanly.
Check the notes you play with a tuner: hold them briefly to confirm their stability and tone.
| Check | Quick action | Purpose |
|---|---|---|
| Goal | Choose 1 or 2 notes | Clearly measurable progress |
| Position | Confirm your tongue reference point | Reliable repetition |
| Air | Low breathing, steady flow | Tone and intonation |
| Reeds | Check gaps and alignment | Responsiveness |
| Tuner | Briefly sustain notes | Confirmation |
“Brief checks lead to substantial progress: practice with a clear aim instead of simply practicing for a long time.”
Conclusion
The same tongue position is often enough to produce a clean overnote. Prioritize accurate pitch, minimal pressure, and a tone close to that of the opposing bend.
Patience: a few months of focused practice make a difference. Work in short sessions, check your pitch with a tuner, and record your progress each week.
Adjustment improves comfort and reliability without replacing technique. A small adjustment helps you sustain a note, but you do not need it at the outset.
Bring these notes into your music early: take phrases you have played for years and repeat them in other octaves to add overnotes naturally. Set a weekly lesson plan and record improvements in intonation and tone.
Every note and every overnote serves musical expression and emotion. To learn more, read a practical article about overnote myths and realities.